Creating Your First Component
Prev: Part 4a: Reading Code Examples
This quick “hello world” tutorial builds a minimal component and previews it in the visualizer.
You don’t need to understand the code yet—we’ll explain what each part does in later sections. The goal here is simply to create your first file, run it with Python, and confirm that everything is working end‑to‑end.
Goal: create a component, generate the visualizer output files, and confirm that it renders.
In your code editor of choice, copy in the following code.
Step 1 — Import PyMFCAD
Step 2 — Create a component
Components are sized in pixels (x/y) and layers (z). You also define the physical resolution with px_size and layer_size (mm).
Step 3 — Add labels
Labels are named color groups used for visualization and organization.
Step 4 — Add a simple void
Step 5 — Add bulk
Step 6 — Preview
Step 7 — Run the script
Save your file as example_device.py, then run it from a terminal:
python example_device.py
or if using uv:
uv run example_device.py
Running the script executes component.preview(), which writes the visualizer output into your current working directory (CWD). The visualizer will automatically load these files when it is opened from the same CWD.
By default, preview() writes to the _visualization/ directory. You can change the output location with preview("YOUR_DIRECTORY_HERE"). If you do change the output folder, the visualizer will not auto-detect it; use File → Open to select the new directory manually.
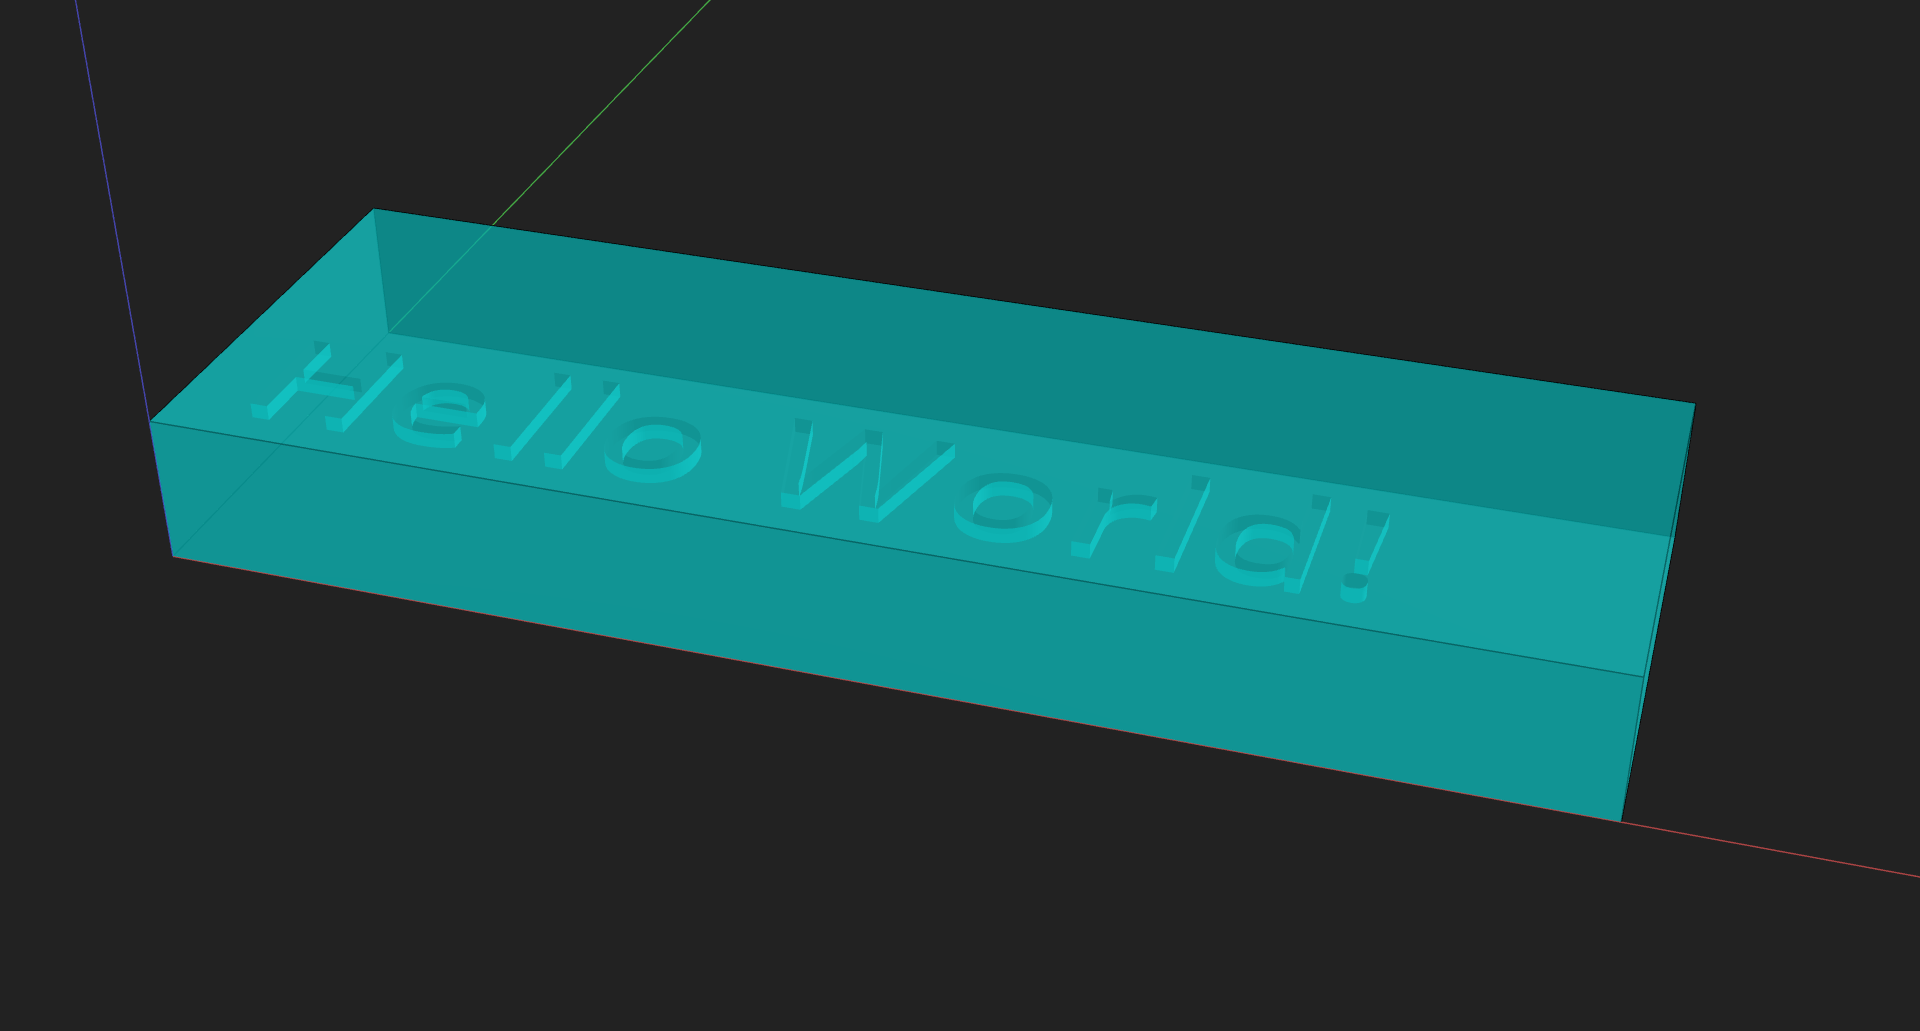
You should see a solid block with the “Hello World” void cut out.
Notes:
- You cannot run a Python file from the visualizer. Run it with your Python interpreter to generate the .glb files the visualizer reads.
- Each run overwrites the target preview directory, even if it already exists. If you want to keep multiple outputs (for multiple Python files/device designs), specify a different
preview_dirfor each. - If your file is in a folder, run it like this:
python YOUR_FOLDER_NAME/YOUR_FILE_NAME.py -
If you are importing your own custom modules, you may have a slightly different file structure and may need to use Python’s module system:
Example folder structure:
- pymfcad_code/
├── projects/
│ └── test_device/
│ ├── __init__.py
│ └── example_device.py
└── components/
├── __init__.py
└── test_component.py
The
test_component.pyfile can define one or more components (e.g.,MyComponent).Import custom components in your code (example_device.py):
from components import MyComponentRun from
pymfcad_codefolder:python -m projects.test_device.example_deviceor if using uv:
uv run -m projects.test_device.example_device - pymfcad_code/
Full example
Checkpoint
Ensure that:
- You can preview the component without errors.
- You can see the text void in the visualizer.